A backpack is arguably the most important item I always bring, and I have exhausted my share of them. Sometimes they have turned sour on me. Most times I deserved it. I haven’t been the gentlest travel partner for them.
Whether it’s dusty or wet, cold or hot, rural or urban, every kind of place brings a different set of challenges for a backpack. Yet for all their diversity, excellence and flaws, I have learned to love each of my backpacks for its particular abilities, and I have learned what qualities to look for, the hard way.
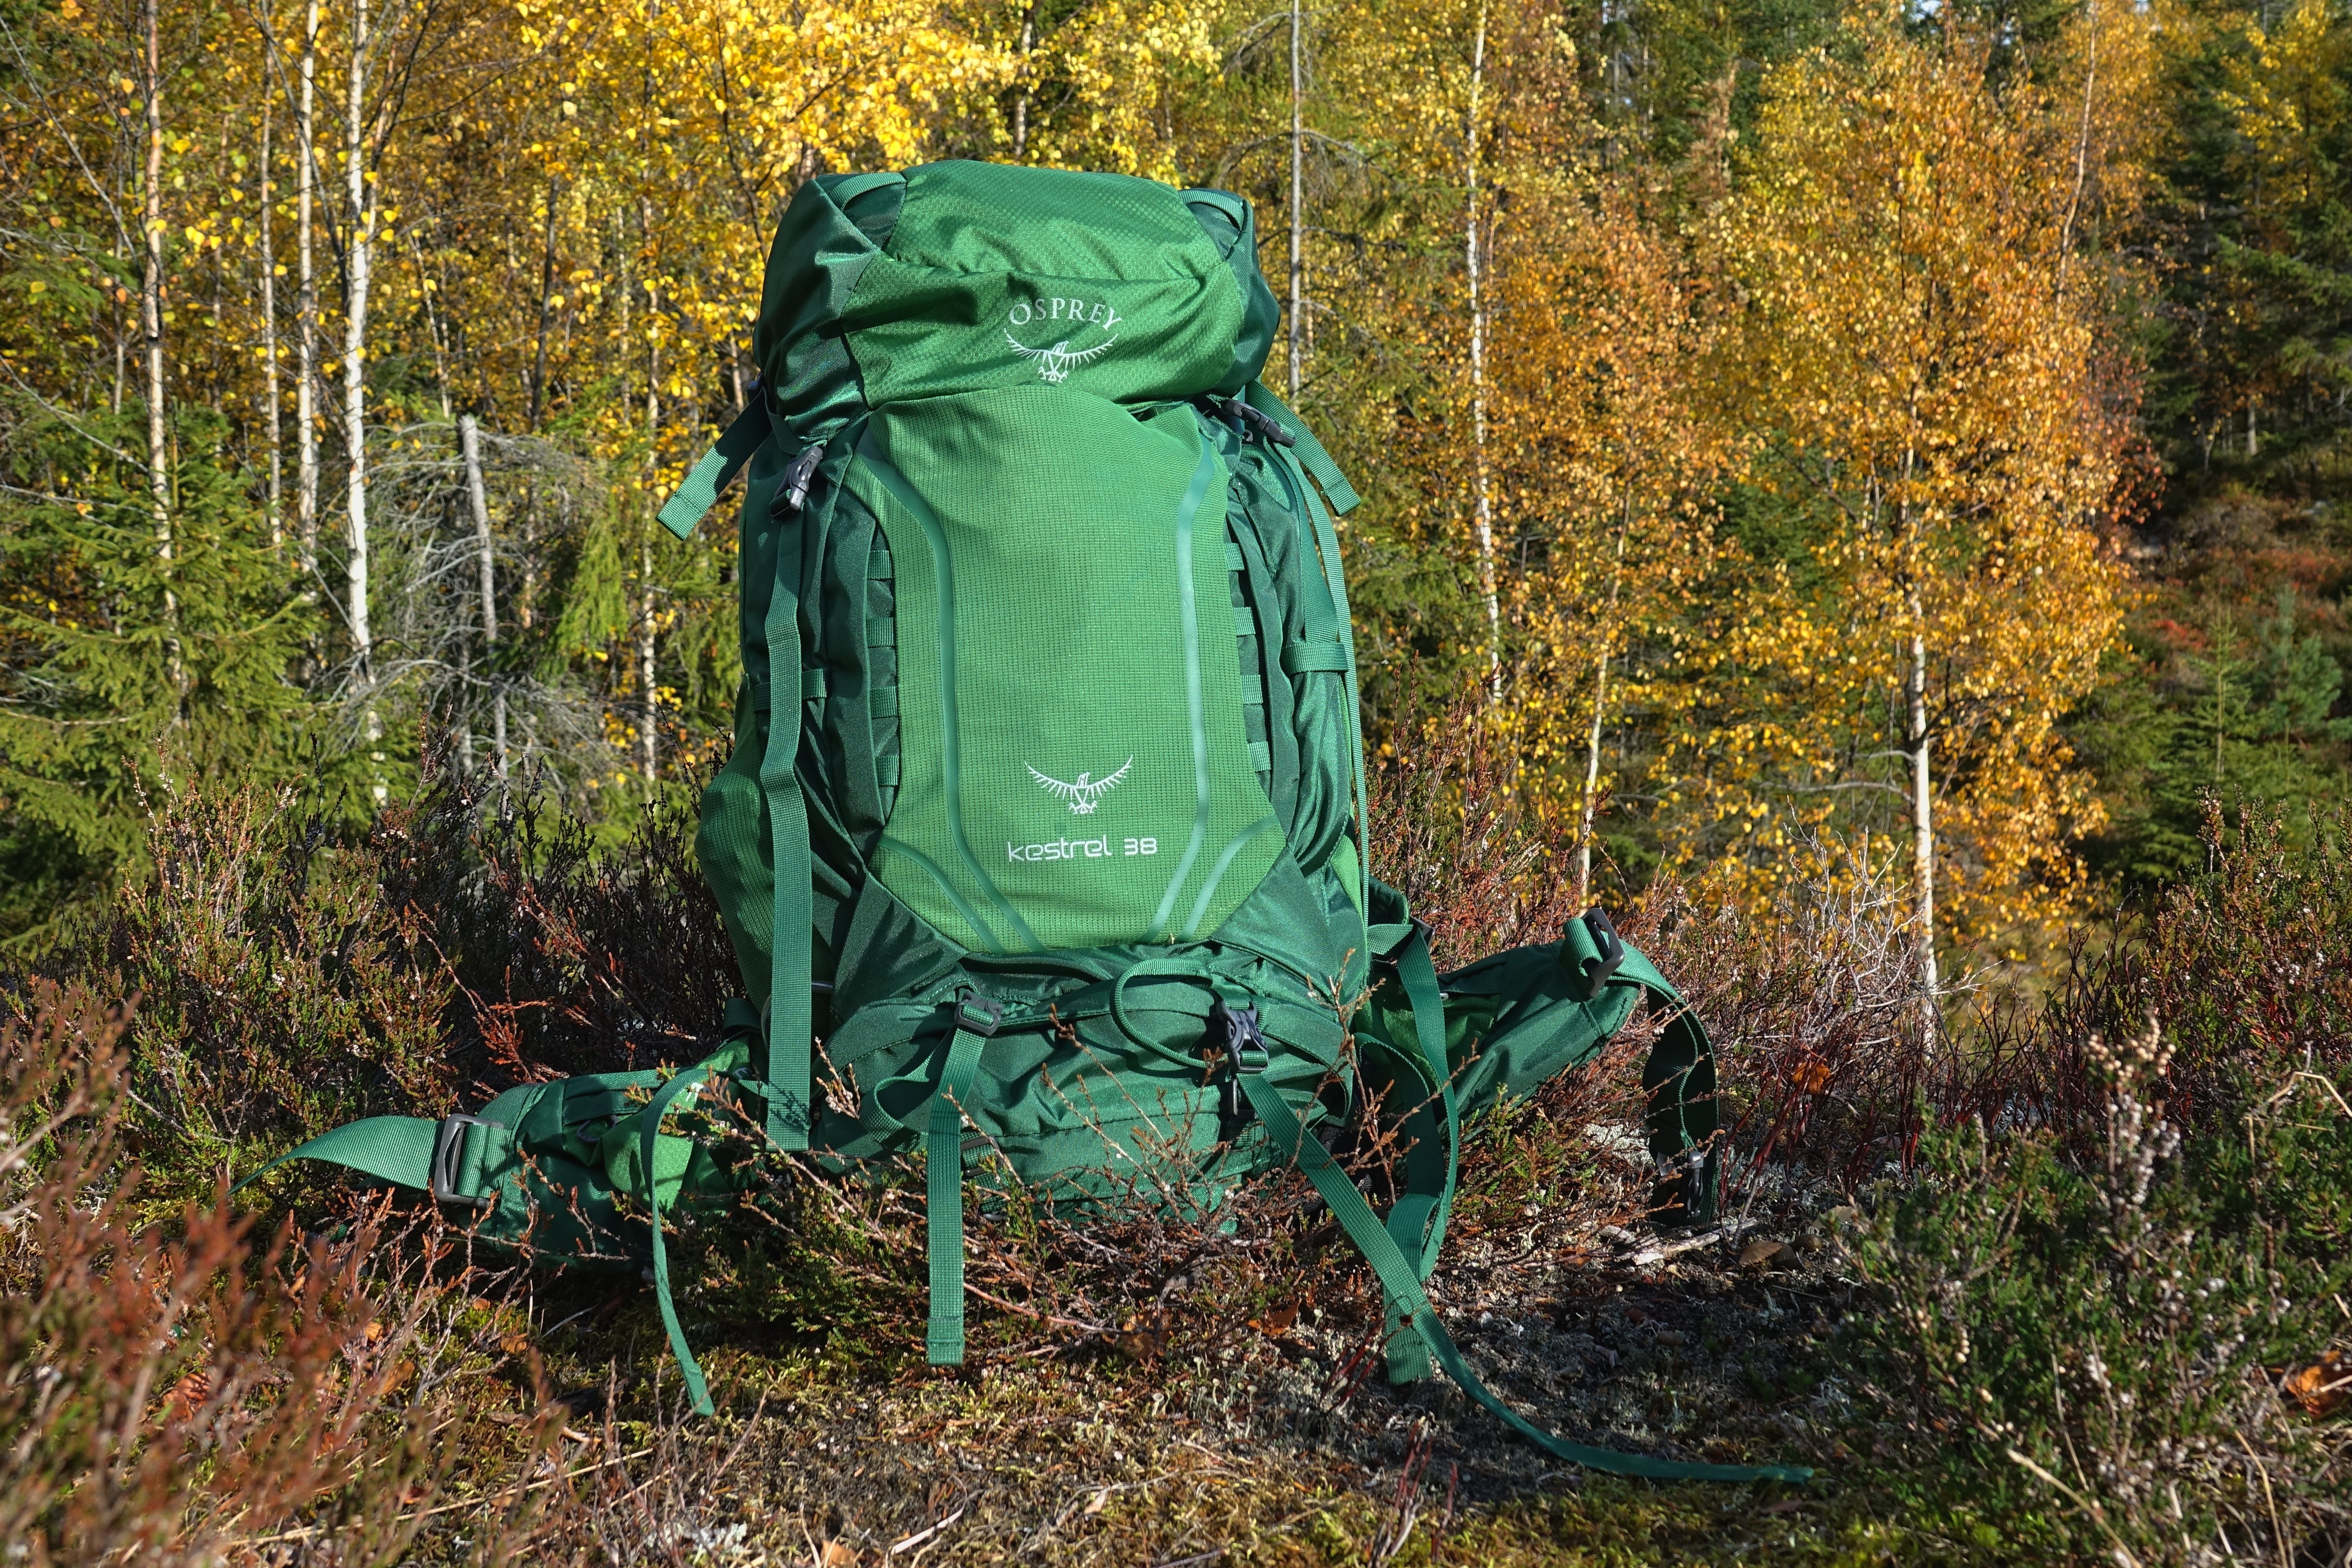
In this post I’ll tell you about my latest backpack, the Osprey Kestrel 38, while also giving you my take on what to look for in a backpack that you plan to use for extensive travel.
Full disclosure: Osprey gave me this backpack. There were no strings attached to the offer, except for a good number of straps, obviously. The following is my honest impression of this product, presented exactly as I want to.
If you decide to buy anything after reading this review, there’s nothing in it for me. Osprey’s intention with giving me a backpack is obvious. My intention, however, is only to tell you what I think about backpacks in general, and how the Osprey Kestrel 38 in particular fits in with my priorities.
Size
I usually travel with one one large backpack of 65 litres or more, and one smaller of 25-40 litres.
The big one is for chocolate and clothes. When I go on major hikes, that is the only backpack I will bring. This article and review is not about that kind of backpack.
A smaller backpack must just be large enough to serve as useful in at least two different scenarios:
- When I travel on buses, trains or planes where luggage must be checked, there must be room for for all my valuables and other carry-on stuff. If you put electronics and camera equipment in your checked-in luggage, it is NOT covered by travel insurance. Airlines and bus companies are responsible for replacing items that are lost or damaged only up to a very limited value. Many travelers have learnt this the hard way. Avoid joining that group!
- On day trips and short hikes, I need my small backpack to fit some camera equipment, a change of clothes and at least one large water bottle.
How Kestrel 38 fits with this
This backpack has (as you probably guessed) 38 litres of space, which makes it a pretty much perfect smaller backpack for me. It’s a bit on the long side, but I can still make it fit under a plane seat without having anyone complain about it. Technically, some airlines may deny me using it as carry-on luggage, but it’s unlikely to be a real issue.
Compartments
I like having many compartments. My brain classifies everything into compartments anyway, so it’s great if I can organize my stuff the same way in my backpack.
- Things I often need should be easy to retrieve from the backpack without having to dig through other stuff.
- Valuables should ideally be somewhat hidden away inside the backpack.
- Side pockets are good. They typically let you add lots of space when you need it, while you can keep the visible size of the backpack small when you don’t carry that much, which probably is most of the time.
How Kestrel 38 fits with this
The compartment setup of this backpack is not ideal, but I’ve gotten used to it.
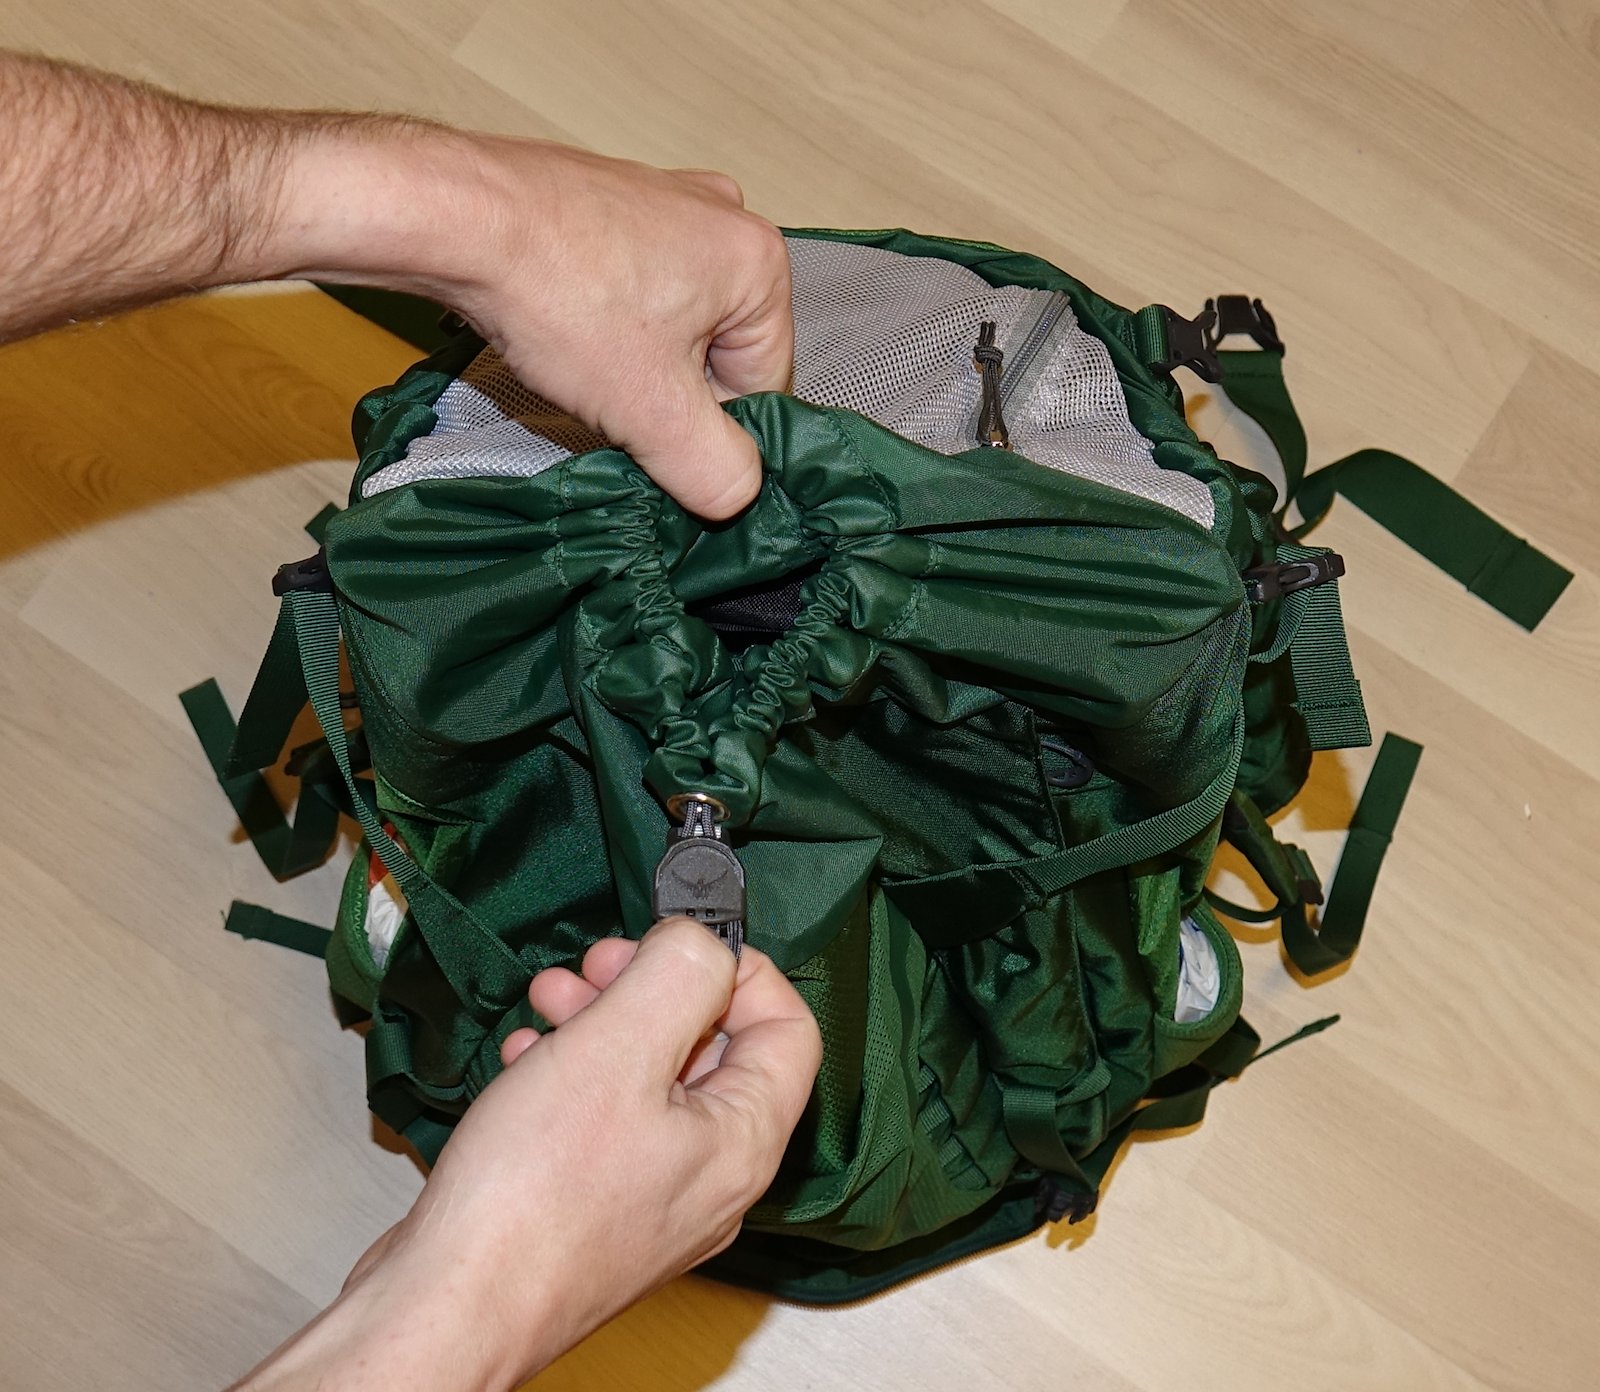
The large main compartment can fit most items I’m likely to bring on a day trip. It can sort of be made into two compartments, but not really. Some backpacks have an internal piece of fabric with a zipper that can function as a solid divider between the top and the bottom compartments. On this backpack it’s different. The divider here is only partial, so small items can slide down from the top to the bottom. On a backpack this size, there’s no need for a divider like that.
A practical zipper towards the bottom of the backpack gives easy access to items there. Another large zipper along almost the entire length of the left side of the backpack gives direct access to the main compartment. If you can’t fit an item through the top opening, you can insert it this way instead.
The lid has both a good-sized external compartment and an internal compartment with a see-through mesh wall. The internal lid compartment is the best place to keep a wallet, a passport and a mobile phone safe and dry, still allowing for easy access.
There aren’t any expanding side pockets that can be closed completely, but there’s a flexible kangaroo pocket on each side and a larger one at the back. If you’re a professional contortionist, you may reach the contents while wearing the backpack. I can’t.
I typically use the side kangaroo pockets to store a bottle of water and toilet paper. It’s stuff I want quick and easy access to, and if it falls out or is stolen it’s no biggie.
Mechanisms for opening and closing
I like my zippers to be large and loud, for security reasons. Small and thin zippers tend to break more often, and a thief can easily use a sharp object to discretely force it open, even while you wear it. Large zippers are harder to break through like that, and if someone zips it open the proper way, you will hear it. This decreases the chance of someone stealing stuff from inside your backpack as long as you’re nearby. Attempts of theft typically happen when you’re in a crowd (in which case you should keep the backpack in front of you), or when you’re on a bus and you’ve put your backpack under your seat or next to you. Large zippers deter thieves somewhat in both situations.
Velcro is just not a good solution for closing anything on a backpack. While it may feel nice and convenient in the beginning, the Velcro gets sloppier with every use, until eventually it doesn’t close properly at all.
Straps and pull-strings can work well, but there are so many different approaches to this that you’ll just have to try several and see which ones you like. If you shop in a store, open and close all compartments. If there’s something you don’t quite understand, ask the people in the shop to show you how to operate it correctly. I know, it sounds silly, but it may be necessary.
How Kestrel 38 fits with this
The zippers on the Kestral are just the way I like them. The main zippers are robust and large, making audible noise as they’re opened and closed. Each zipper has an easy to grip hook attached to it.
The mechanism for opening and closing the top of the main compartment was a puzzle to me at first. It took me a couple of weeks to figure out how to operate it the right way. Use one hand to hold on to the handle that keeps the two ends of the pull-string together, while you use your other hand to pull at the opening to make it as large as you desire.
This may seem a bit awkward at first, but this mechanism actually ensures that the opening stays at exactly the size you choose. If you carry a large object that sticks out at the top, you can tighten the opening as much as possible, and thus keep the object in place even during the shakiest of walks.
Comfort
All other features aside, you always should try a backpack on in order to decide if it’s right for you. Different backpacks come with different ways to adjust them. An expert will no doubt magically appear to help you with this in any shop that sells expensive backpacks, but you should ideally be able to figure it out on your own.
Only you know when a backpack feels right on your back, and the optimal adjustment may vary depending on how much weight you carry inside it.
- You want the main straps to be well padded. A strap that digs into your shoulder or chest when the load is heavy is a real pain.
- You want the length of the suspension system on the backpack to fit the length of your back. Some backpacks let you adjust this length, but they tend to either be expensive models, or the system may be flimsy and prone to breaking, rendering the backpack useless.
- You want a belt around your waist that lets most of the weight on your back be carried by your hips. If it does, you can use your impressive leg muscles to carry your load. If the weight pulls your shoulders back, on the other hand, you might as well walk around with your stuff in plastic bags in your hands instead.
- You want straps across your chest, so that you can tighten them and make the backpack hug you from behind. There should still be air flowing up and down between your back and your backpack, to minimize your sweating. A wet t-shirt being pushed around on your skin by a backpack may lead to all kinds of unpleasantness.
How Kestrel 38 fits with this
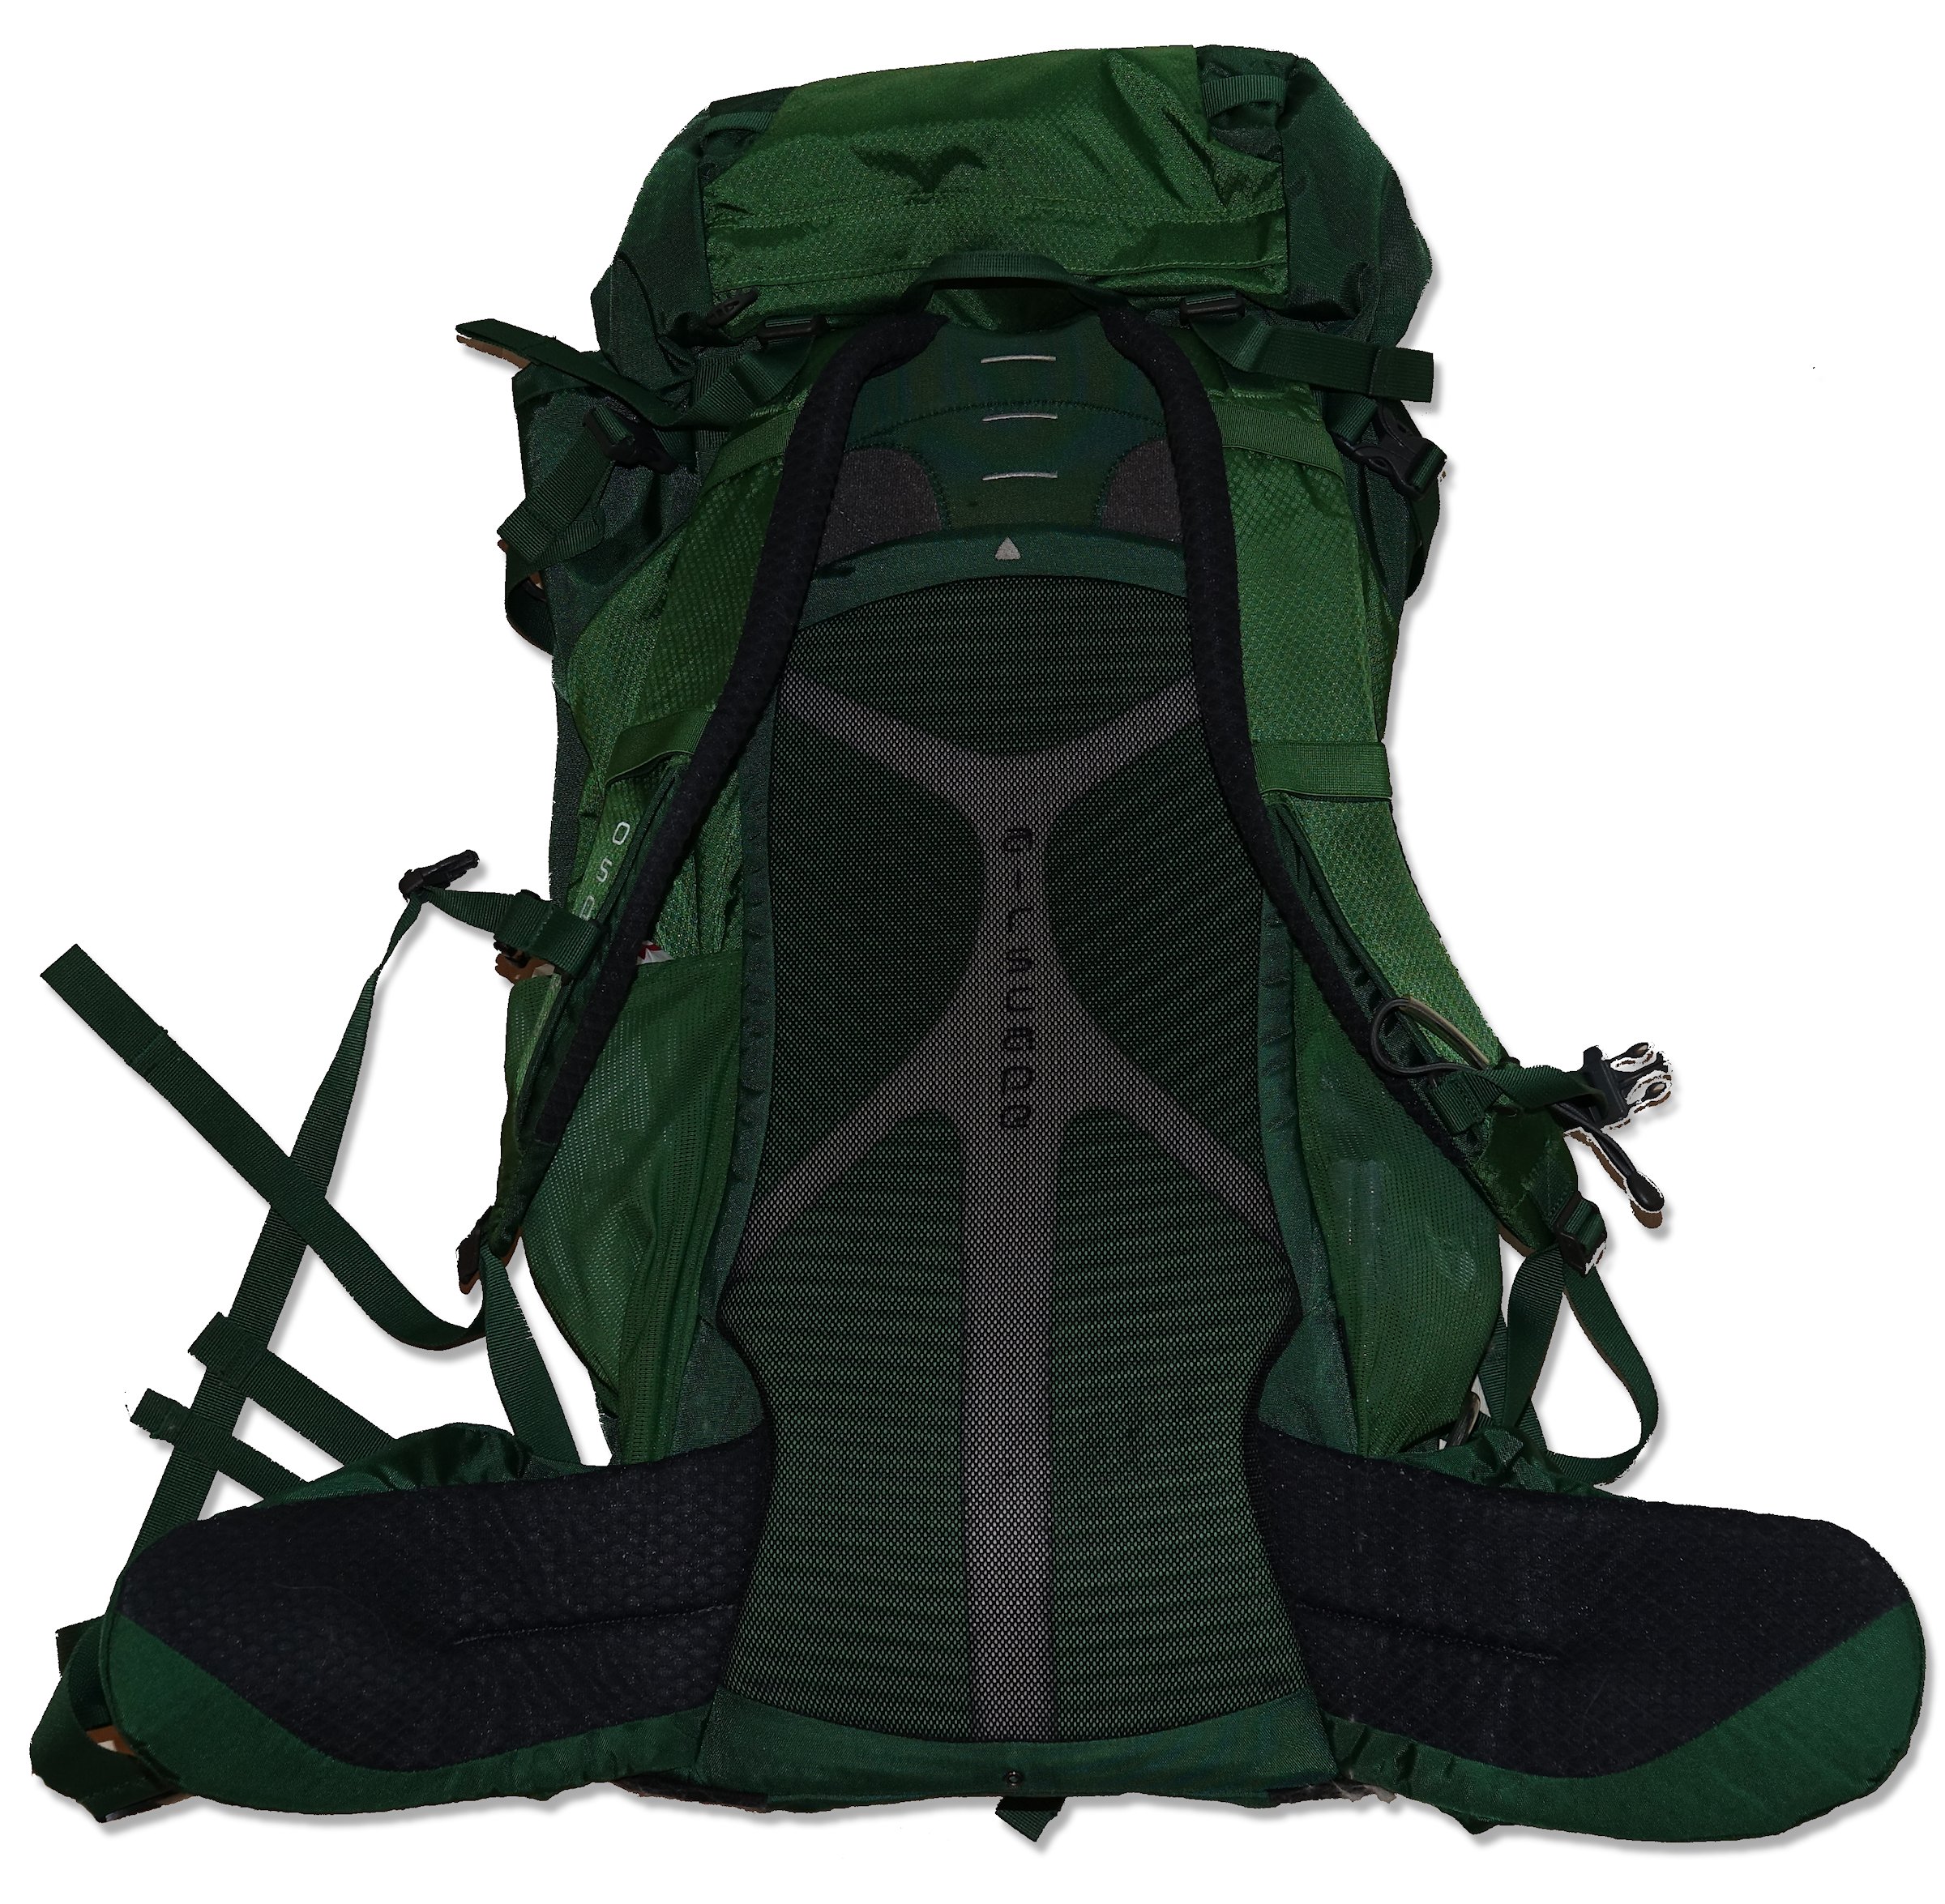
It was easy to make this backpack fit me well. The part of the suspension system that will be in touch with your back has a fixed length, so it should fit your back reasonably well even before making adjustments.
Behind the shell facing your back, there’s a plate that is fixed to the compartments part of the backpack. This plate can be moved up and down and kept in place by a pair of really sturdy Velcro fasteners. You won’t be changing this a lot, so there’s no danger that the Velcro will wear out. This is, to me, a better system than many others I have tried. Other mechanisms are often more vulnerable to breaking than Osprey’s system probably is.
The backpack comes with air flow channels, in the shape of the cheesily named Airscape system. Even when the backpack hugs me tightly, there’s plenty of room for air to travel up and down my back. I still get sweaty, of course, but these ducts keep me reasonably dry in most hiking conditions.
The straps are well padded, and the hip belt sits exactly where I want it to. Each part of the hip belt also has a small pocket. I’m not sure what to use it for, though. A GoPro will fit in there, but a full-size modern smartphone will not.
There’s also a crossing strap in the front that can be tightened just below my chest. I can use it to pull the main vertical straps together, which will drastically decrease the load stress on my shoulders.
Special Features
Different backpacks come with all kinds of special purpose functions. It can be literally anything, from USB ports to GPS tracking systems, so I won’t try listing them here. Instead, here are some of the features of Kestrel 38 that I haven’t already mentioned.
- The backpack comes with a rain cover, neatly hidden away at the very bottom of the backpack. Unless you’re hiking in a desert, this is a good thing to have, especially when it’s as lightweight as this one is.
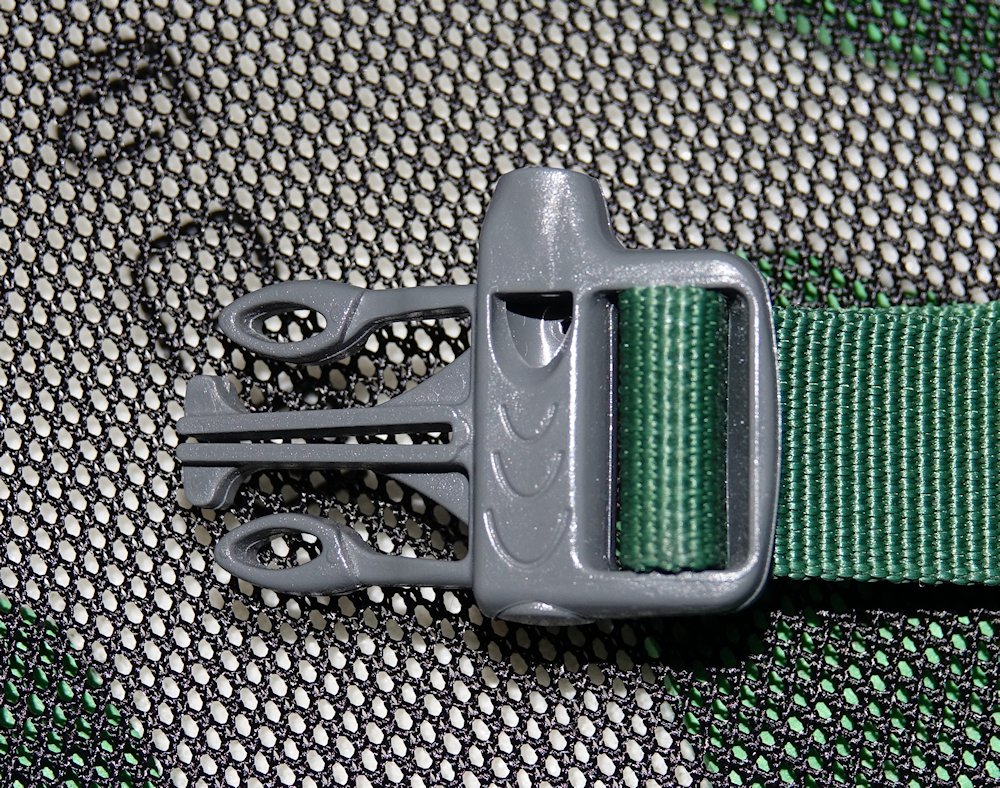
- The chest strap has a whistle built into it. If you get stuck somewhere without a mobile phone signal, the high frequency sound this whistle produces gets you a much more efficient way to call for help than shouting would be.
- Nicely spread out across the front and back of this backpack, there are many gear loops, daisy chains and other details that will let you attach various items to your backpack. If you travel by plane, you’re usually allowed to bring only one carry-on item. If you want to carry more items, just use karabiners to hook additional items onto your small backpack, and you should be good to go. Please use this loophole responsibly.
- There’s a hidden space between the suspension system and the main compartment. What you’re supposed to do with it is to squeeze in a water bladder or pouch, which typically come with a tube so that you can have access to water without taking off your backpack.I’m not into that, because body-heated water is not my favorite. Instead, I’ve found that this space is a perfect place to put my iPad, inside a waterproof cover. It’s safe there, and still relatively easy to access. Important papers, too large for a wallet, can also be safely stored here.
In Conclusion
All in all, I’m happy to recommend the Kestrel 38 for day trips where you need to bring along many items. The Kestrel backpack series comes in 48, 58 and 68 litres versions as well. They’re pretty much identical to the backpack I’ve described here, only larger, of course.
You can find more information about the backpack on the Osprey web site.
Thanks for reading, and happy trails to you!